User & License
It often provides a centralized hub for creating, organizing, and managing users, teams, groups and licenses that influence and interconnect with other modules within the CRM.
User Management
management, tracking activities, implementing security measures, managing communication, assigning tasks, facilitating reporting and analytics, enabling customer segmentation, fostering collaboration, and maintaining a historical record of interactions. Essentially, user profiles contribute to a seamless and organized workflow, enhancing overall effectiveness in real estate operations. In this module, you can manage the users and utilize all the following features
Create User
Follow the following steps to create a user
- Click "Create User" to add a user.
- Provide User Name, Date of Birth, Gender, Email, Contact Number, Calling ID, Maximum Lead Capacity, User Role, and Profile Image.
- You can customize your password but the default password is “REAL+Contact Number’s Last Five Digits”.
Upload User
Follow the following steps for uploading the users in bulk
- Download the Sample User Upload Sheet.
- Fill in details like User Name, Email, Contact Number, etc.
- Upload users using the Sample User Upload Sheet.
Counters
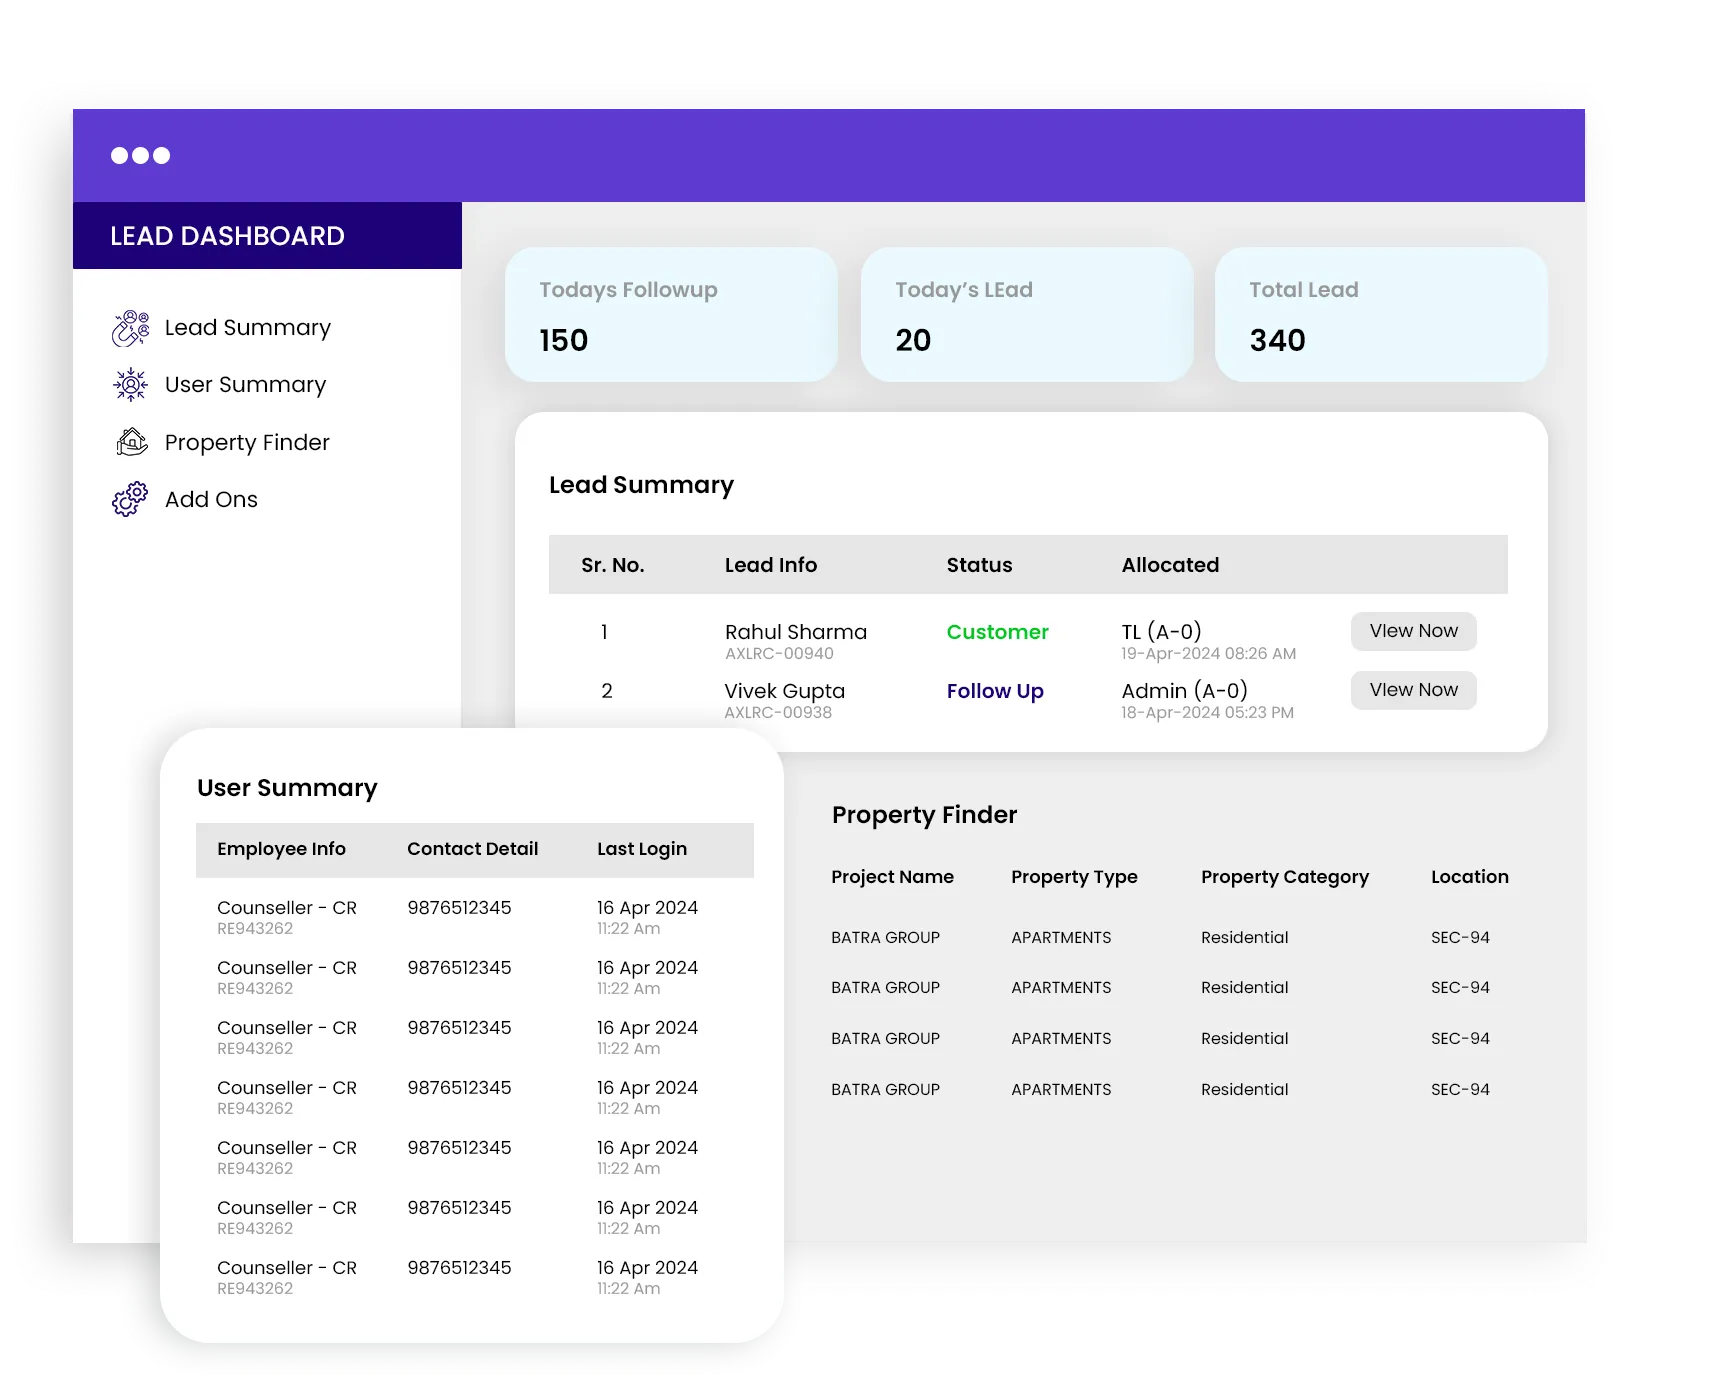
Counters play a pivotal role in providing quick insights into the current status of users. There are five counters available:
- Total Users: View the list of all users.
- Total Active Users: Access the list of active users.
- Total Deactivate Users: View deactivated users.
- Online Users: See the list of online users.
- Offline Users: Access the list of offline users.
Filters
Filters are used to refine the data displayed on the user management dynamically according to your specific requirements. You can utilize filters to focus on specific criteria such as User Name, Select Role, User Contact Number and User Email.
List
View details of the user including Employee ID, User Name, Contact Number, Last Login (with date & time), Head Name, Team Leader Name, Created At and Action Buttons.
Export Required Sheets
Export essential sheets for better data management: The sheet is
- Role: Export the User Role Sheet for reference.
Export
You can export the user list for offline reference. To export the list, follow the following steps
- Click on the “Export” button.
- Export the user list for offline reference.
Employee Role
You can view employee role names with their short name description. Follow the following steps
- Click on the “Employee Role” button.
- View all Employee Roles and their Short Names.
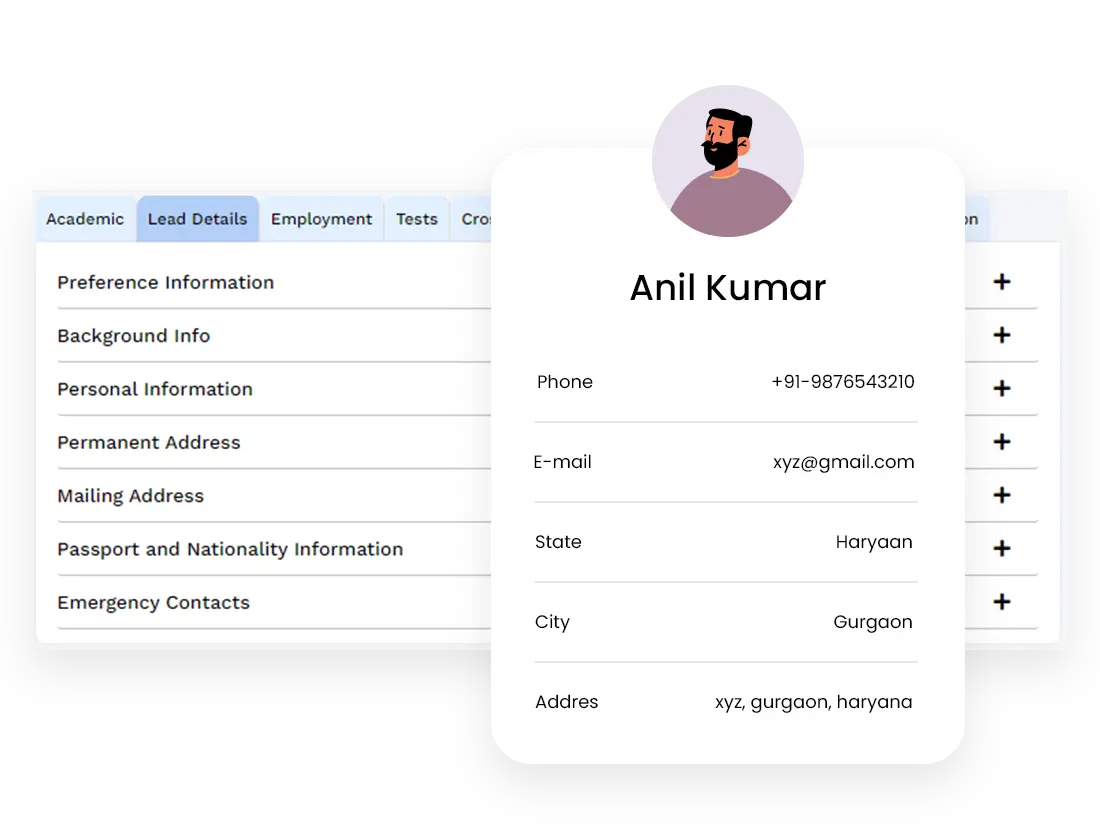
View User
Access detailed user information in the view user section. You just need to click on the view button to view the details of the user:
- User Info: User Name, Calling ID, Contact Number, Email ID, Role Name.
- Basic Details: DOB, Gender, Official Email, Alternate Contact Number, PAN Card, Aadhaar Card, Country, State, City, Address, Pincode.
- Mapping Details: IVR Number Details, Team Details, Group Details.
Edit User
Follow the following steps to modify the details of the user:
- Click on the “Edit” button.
- Modify user details, including User Name, DOB, Gender, Email, Contact Number, Calling ID, Max Lead Capacity, Role, Profile Image, and Password.
Activate or Deactivate
The activation or deactivation process in a CRM system typically involves enabling or disabling certain functionality within the CRM. This functionality is often utilized to control the visibility, usability, or status of specific elements based on business needs. Follow the following steps:
- Activate or deactivate the user as per the requirement.
- By default, the status of the user is set to active.
- If you want to change the status of the user then click on the Activate/Deactivate button in the Action menu in the list and vice versa.
Delete
In this section, users can delete the user permanently. The "Delete" functionality in the User Management module of a real estate CRM allows users to permanently remove a user from the system after deactivation. Follow the following steps:
- Before deleting a user, ensure that the user is deactivated. This is typically done by changing the status of the user from "Active" to "Inactive.
- After deactivating the user, a "Delete" button will appear.
- Once the user is deactivated, click on the "Delete" button to initiate the permanent removal process.
- A confirmation prompt may appear to ensure that the user intends to delete the user permanently. This step is crucial to prevent accidental deletions.
- Confirm the deletion by clicking on "Yes" or a similar confirmation option. This final step completes the deletion process.
Revert
The “Revert” button will appear after the deletion process. If you want to revert the deletion request then this section is very helpful to you. Follow the following steps:
- Revert a deletion request within 48 hours by clicking on the Revert button. The revert button will appear after confirmation of deletion.
Deleted Users
Follow the following steps to view the deleted users and their detailed information:
- Click on the “Deleted Users” button.
- View details of all the deleted users.
Team Management
It involves navigating conflicts, strategically allocating resources, and setting clear goals for the team's success. Team managers play a pivotal role in motivating and building a cohesive team, fostering a positive culture through effective communication, and providing constructive feedback for continuous improvement. Additionally, adept team management extends to adaptability in the face of industry changes, proactive risk management, and the cultivation of strong customer relationships. In this module, you can manage teams and utilize all the following features :
Create Team
Add/Remove Team Member
List
View Team
Edit Team
Send Email
Delete Team
Create Team
Follow the following steps to create a team
- Click on the “Create Team” button.
- Create a team by providing a Team Name and selecting a super User (head of the team). [Note: In this section, you can only create a team and can’t add or remove any team member. For adding team members, go to the next section named “Add/Remove Team Member”.]
Add/Remove Team Member
Follow the following steps to add or remove team members
- Click on the “Add/Remove Team Member” button.
- Select the Team and the Super User (automatically fetched).
- Add or remove Sub Users by clicking on the Add or Remove button.
List
View details of the team including Team Name, Team Head Name, Team Head Role and Action Buttons.
View Team
Follow the following steps to view the details of the team:
- Click on the “View” button.
- Access detailed team information, including Team Name, Team Head Name, and Team Sub Users.
Edit Team
Follow the following steps to modify the team details:
- Click on the “Edit” button.
- Edit the team by changing the Super User.
[Note: You can only change the Super User but can’t change the name of the team.]
Send Email
Follow the following steps to send the email to the team
- Click on the “Send Email” button in the Action menu in the list.
- Send emails to all the team members.
[Note: If you want to send an email to the team or all the team members then you can do it from this button. But if you want to send emails to individuals then you can do it from the view team section.]
Delete Team
Follow the following steps to delete the team permanently:
- Click on the “Delete” button in the Action menu in the list.
- Delete the team after confirmation.
Group Management
A group is a collection of team or team members and a project is assigned to the group and each group has a group head. You can manage groups and utilize all the following features:
Create Group
List
View User List
Edit Group
Delete Group
Create Group
Follow the following steps to create a group:
- Click on the “Create Group” button.
- Create a group by providing the Group Name, selecting Project, Group Head, Teams, and Users.
List
View details of the group including Group ID, Group Name, Group Head Name, Project Name, and Action Buttons.
- Click on the “Create Group” button.
- Create a group by providing the Group Name, selecting Project, Group Head, Teams, and Users.
View User List
Follow the following steps to view the list of group users
- Click on the “View” button.
- View the list of users added to the group.
Edit Group
Follow the following steps to modify the group details
- Click on the “Edit” button..
- Modify group details, including Group Name, Project, Group Head, Teams, and Users.
Delete Group
Follow the following steps to delete the group permanently
- Click on the “Delete” button.
- Delete the group after confirmation.
Ask about TiggerOn products, pricing, implementation, or anything else. Our highly trained reps are standing by, ready to help.